In this section, we will show you how to set up the tegolyDATEV connector.
This installation guide is intended for technical staff or IT administrators.
Install the tegolyDATEV Connector on all terminal servers of the law firm. When installing, please make sure that the connector is installed in C:/Program Files.
After installation, the connector opens automatically. Now some settings are still necessary, these are different for:
– DATEV document storage
– DATEV document storage with revision
– DMS
Points 1, 2, 3 and 7 are general settings and apply to all types of filing. #
Items 4, 5 and 6 are to be set depending on the discard type.
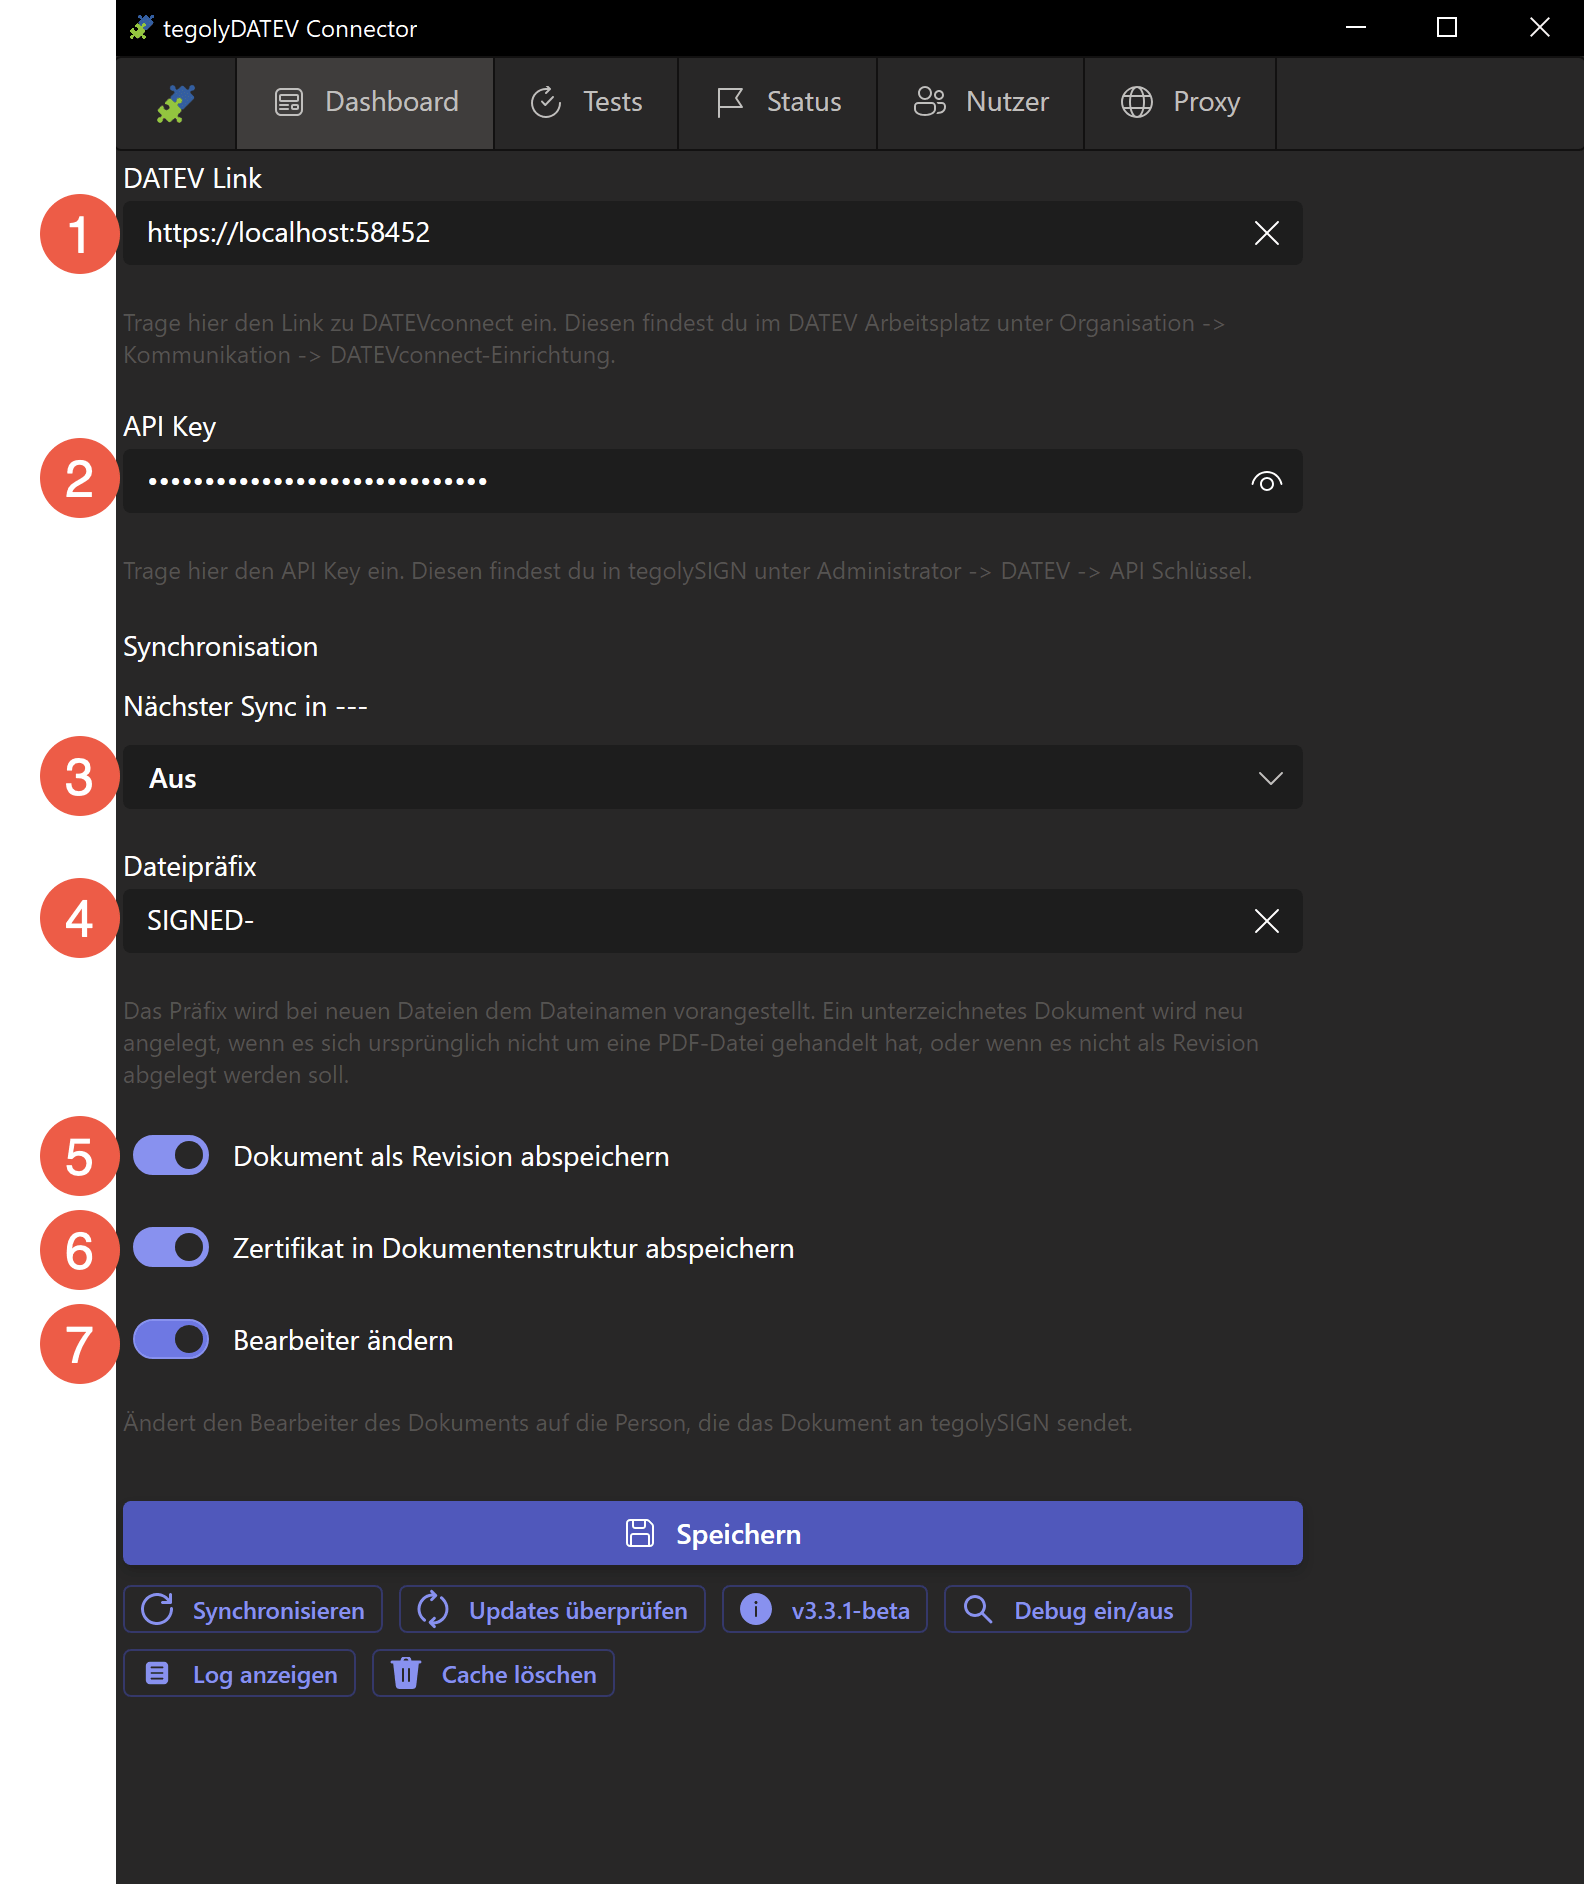
General settings #
![]()
Enter the path to your database server in the form https://Servername:Port. Here’s how to find out the server and port:
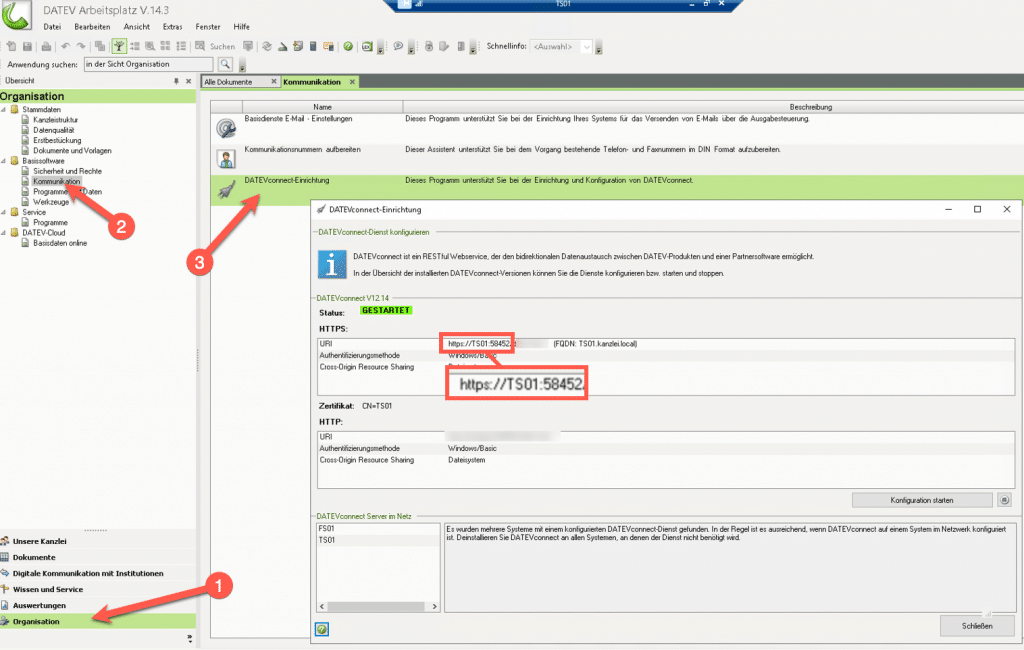
Go to the DATEV workstation 1. Organization, then click 2. Communication and 3. DATEVconnect setup. Here you will find the server name and port marked in the picture.
![]()
The API key can be read from the tegolySIGN under “Administrator – DATEV”. Copy and paste it here.
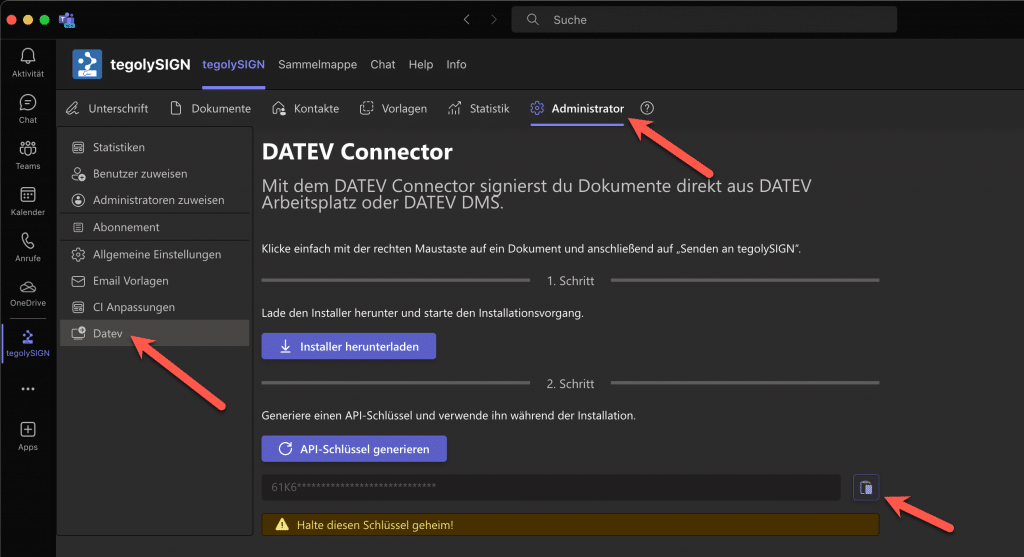
If the key doesn’t already exist, click on “Generate API Key”.
![]()
Here you can set the time interval in which the documents are synchronized. Typically, you set 5 minutes here. The status bar above shows you when the next synchronization is running.

![]()
Change processor: here you can set whether the processor who transmits the documents to tegolySIGN should be entered in DATEV as a document processor.
What type of filing does the law firm use? #
You use DATEV document storage #
![]()
File Prefix
We recommend setting a file prefix for DATEV document storage. This means that new files that are placed in the document repository are prefixed and can be better distinguished from each other. Here you could set e.g. “sign“.
If you leave the prefix blank, the file name will not be changed.

![]()
This switch must be turned off!
![]()
This switch must be turned off!
All settings are hereby made. Now you can test whether everything works correctly.
You use DATEV document storage with revision #
![]()
File prefix can be left blank because the documents are filed as revisions.
![]()
We recommend turning on this switch for document storage with revision. This means that documents that are fully signed are stored as a revision in DATEV document storage with revision. Otherwise, documents are always stored with the client as a new version.
![]()
This switch must be turned off!
All settings are hereby made. Now you can test whether everything works correctly.
You use DATEV DMS #
![]()
File prefix can be left blank because the documents are filed as revisions.
![]()
We recommend switching on this switch for DATEV DMS. This means that documents that are fully signed are stored in DMS as revisions. Otherwise, documents are always stored with the client as a new version.
![]()
The Certificate of Completion (CoC) can be stored in the document structure of DATEV-DMS via this switch. Otherwise, the CoC will be stored as a new document with the client.
All settings are hereby made. Now you can test whether everything works correctly.
Status #
With the status in DATEV DMS, the documents are assigned a corresponding status in order to filter or search for them, for example.
To do this, a status must first be created in DATEV and then it can be selected in the connector. You can find more information on how to create the status here:
Creating Document Status
The following settings still have to be made
Go to “Status” in our connector and select the previously created status from the list for the two states of a document. Save your selection. Ready!

You can use the “Reset” button to delete the status.
All settings are hereby made. Now you can test whether everything works correctly.
Testing the settings #
The connection between DATEV DMS and tegolySIGN can be tested here.

If all tests are successful, the status is shown in green.

Congratulations! The installation was successful.
If not all of them were successful (red), then contact us via contact@tegoly.com
User (optional) #
In the “Users” tab, DATEV users can be connected to tegolySIGN users. This will assign the documents to the appropriate users.

Sign in with your Microsoft account and follow the instructions. This must be a user from the tenant where tegolySIGN is also installed
..
Once you’ve signed up, you’ll be able to search for the users you want to link.

Select the ones you want to link on the DATEV and tegolySIGN pages and click the “Link” button.

Now you can see the Linked Users in the list. A single link can be deleted at any time from the trash can. Or you can delete the whole list via “Reset”.
Please save the setting before closing the connector.

Proxy (optional) #
Here you can set up a proxy server. Please enter the address and port here and go to Save.
