Connecting Exchange Online Server #
Here you can integrate your Exchange Online server so that the documents sent for signature are sent via your e-mail address.
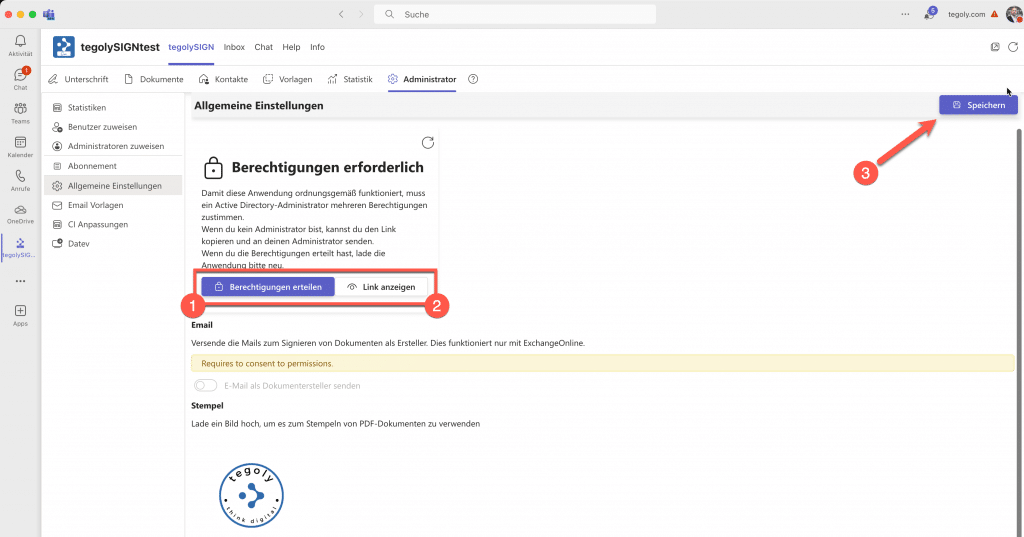
First, a Microsoft administrator may need to approve you to use this feature.
This can be done directly via the Grant permission button, if an administrator is not present, you can send the link. Click on 2 Show link and send to the administrator.
Save the setting. READY!
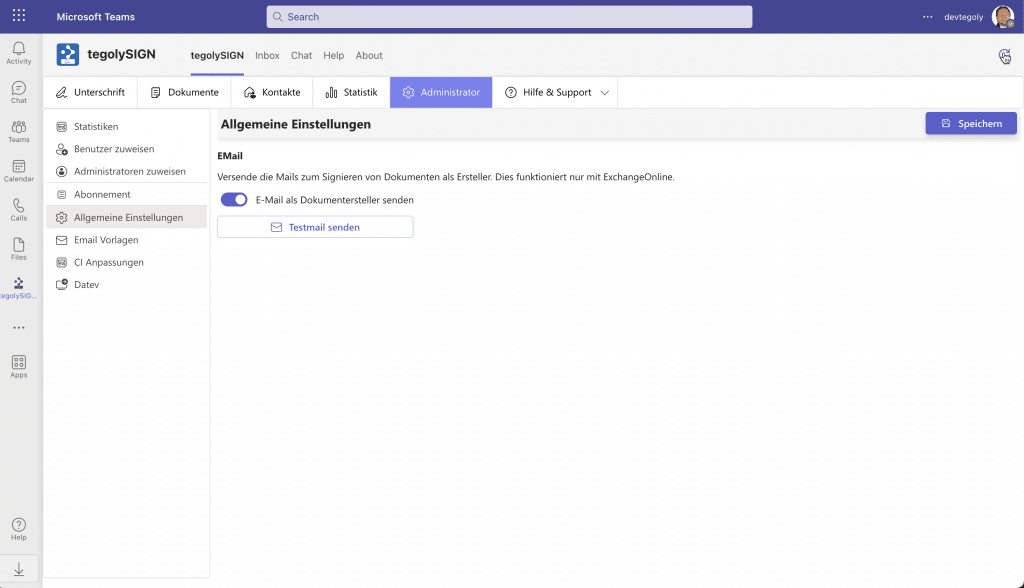
Set the switch to Send email as document creator and save the setting.
Now you can send an e-mail to the test. They will send you an email via your Exchange account. When the email arrived, the test was successful.
This setting is active IMMEDIATELY for ALL tegolySIGN users!
Stamp #
You can store global stamps for all users. To do this, load an image with max. 1000 x 1000 pixels high. To do this, go to ” + Upload Logo”.
Then go to Storage (top right). The stamp is immediately available to all users. Here’s how to use it.

Groups #
With the group function, you can group several people together, who can then work on the signature processes together. For example, you and your colleague are responsible for the signature processes in your law firm. In order for you to be able to see and edit your colleague’s processes, you need the group function of tegolySIGN. You can create as many groups as you like.
To do this, go to Administration – General Settings – Groups and click on New Group.

A new window will open – New Group.

Enter a group name such as “Secretary” and select the people you want to have in the group.
In the left column, all persons who have a license for tegolySIGN appear. To assign a person to the group, click on the “Add user” button and the user will appear in the right column. You can delete the person using the trash can icon .
Group rights #
You can give each group additional permissions:
- Share documents:
everyone in the group can view and edit the documents (i.e. entire signature processes). - Share contacts:
each can view and edit the addresses of the other under Contacts. - Prefix for signatures:
everyone in the group gets a prefix in front of their name, e.g. ppa. John Doe.
For example, you can create different groups, e.g. for the people who sign the order .

Edit Groups #
Then the new group with the assigned persons appears. The group cannot be edited.

The group can be deleted via the trash can . If you want to change the participants of the group, you will need to delete the group and create a new one.

Order and due date optional #
Order and due date can be determined. This can be useful if you never work with any of these features. This is a general attitude and affects all users.

Recent Documents #
With this function, you can turn off the display of “Recently Used Documents”. This means that it is then hidden from every user.

Handwritten signature #
This feature adds a field to the signature that prompts the signer to insert a handwritten signature. The field will appear during signing.
You’ll need to enable it individually for the signature process.
To turn on the function in general, go to Administration – General Settings – Handwritten Signature. The function is activated when you select the switch.
Please press Save at the bottom right.

When you complete the signature process, you can activate the handwritten signature for this process under the Additional option.

Automatic reminders #
This feature allows you to add automatic reminders for all signature operations. An interwall can be selected and how often the reminders should be sent.
To turn on the feature in general, go to Administration – General Settings – Automatic Reminders.

You can choose how many days you want to be reminded of. Choose from 3, 5, 7 or 10 days. Then you have to choose how often the reminders should be sent.
To do this, go to Maximum and choose from 1 – 10.
In our example, this would mean: A reminder is sent every 5 days and 3 times, so the last reminder is after 15 days.
Please press Save at the bottom right.
