Skip to content
tegolySIGN
Home tegoly Support German

Introduction

2
  • What is tegolySIGN
  • tegolySIGN Roadmap

First steps

4
  • Installation of the TEAMS APP
  • Grant access
  • How to get started with a trial subscription
  • How do I log in to tegolySIGN

tegolyDATEV Connector Installation

5
  • Installation tegolyDATEV Connector
  • Settings of the tegolyDATEV Connector
  • Terminal server
  • Multiple Terminal Servers
  • Desktop

Signing with tegolySIGN

16
  • How to prepare documents for signature
  • The Enterprise Version
  • Add contacts to the document
  • 2-factor authentication in the Enterprise version
  • Order
  • Maturity
  • Ready
  • Stamp
  • Favorites
  • Forms
  • Signing with QES
  • Authenticate for QES
  • Sign with Verimi eID
  • MultiSign
  • Signature link
  • Forwarding Signature Operations

Signing documents

4
  • Open a document
  • Signing a document
  • Reject
  • Save

Statistics

1
  • Statistics on your documents

Documents

4
  • List of all documents
  • Sort documents
  • Document Filters
  • Process documents

Administration

10
  • Statistics
  • Assign users with tegolySIGN’s Teams app
  • Assign Administrators
  • Subscription Management
  • Features in the Enterprise Version
  • General settings
  • DATEV
  • Assign users in the tegolySIGN WebApp (not MS Teams)
  • tegolySIGN Portal
  • Group function

Binder

1
  • The tegoly binder

General information on the digital signature

2
  • The eSignature
  • Your review helps us a lot!

DATEV-DMS

8
  • Preconditions
  • Document(s) from DATEV handed over for signature
  • Installation and setup
  • How does my signed document get back in DATEV-DMS
  • tegolySIGN Connector – Configure DATEV status
  • Transfer e-mail addresses from the client
  • tegolyDATEV Connector Update
  • Start tegolySIGN in DATEV

Power Automate Connector

2
  • A workflow example
  • What is Microsoft Power Automate

Templates

3
  • Create Templates
  • Send Templates
  • Edit templates

Trial period

1
  • Onboarding

DATEV Installation

6
  • Installation tegolyDATEV Connector
  • Settings of the tegolyDATEV Connector
  • Terminal server
  • Multiple Terminal Servers
  • Desktop
  • How do I log in to tegolySIGN

tegolySIGN Portal

1
  • The tegolySIGN Portal
  • Home
  • Docs
  • tegolySIGN
  • Signing with tegolySIGN
  • Signing with QES
View Categories

Signing with QES

The qualified signature is characterized by the fact that it identifies the recipient. Below is a description of how to create documents and how they will be signed with a qualified signature once received. Here you can also find out how to identify yourself with Verimi and eID.

Send documents for signature with QES #

Basically, it works like EES and FES, with the difference that each signature has a cost. You basically don’t have to worry about anything else, the billing is done in the background.

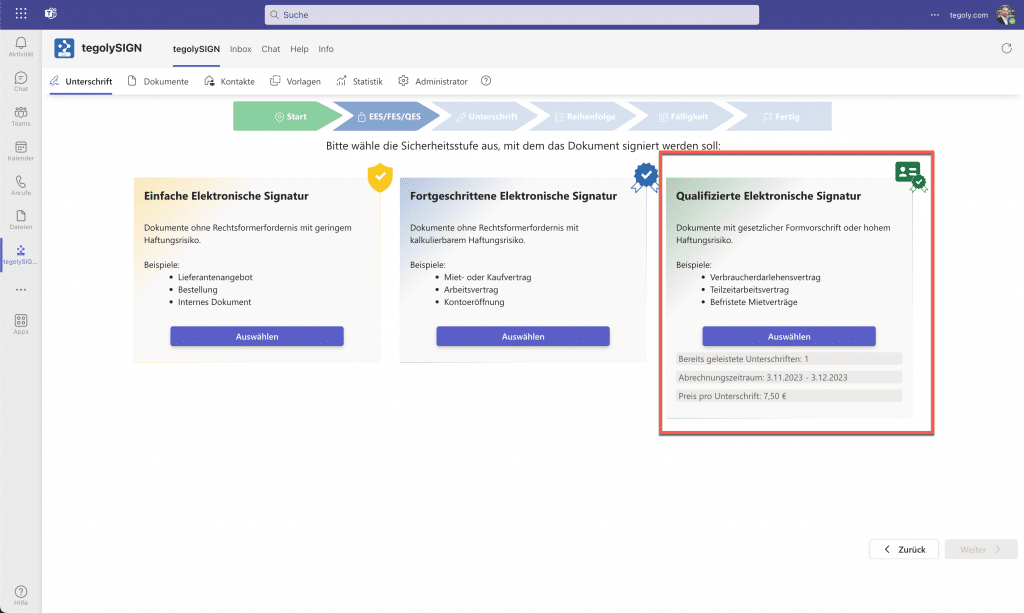
Upload your document as usual and select QES in the next step. You can then edit the document.

Sign documents with QES #

The qualified signature is characterized by the fact that the signatory is identified. How it works is described below.

Invitation E-Mail #

You will receive an email as soon as you are part of a signing process. Inside this e-mail there is a button that leads to the signature page.

Sign #

After opening the e-mail link, you will be taken to our site, where the signing process starts. You don’t need an account for this. All you have to do is confirm the T&Cs and Privacy Policy and continue.

If the initiator of the workflow has entered a password, you must enter it when logging in.

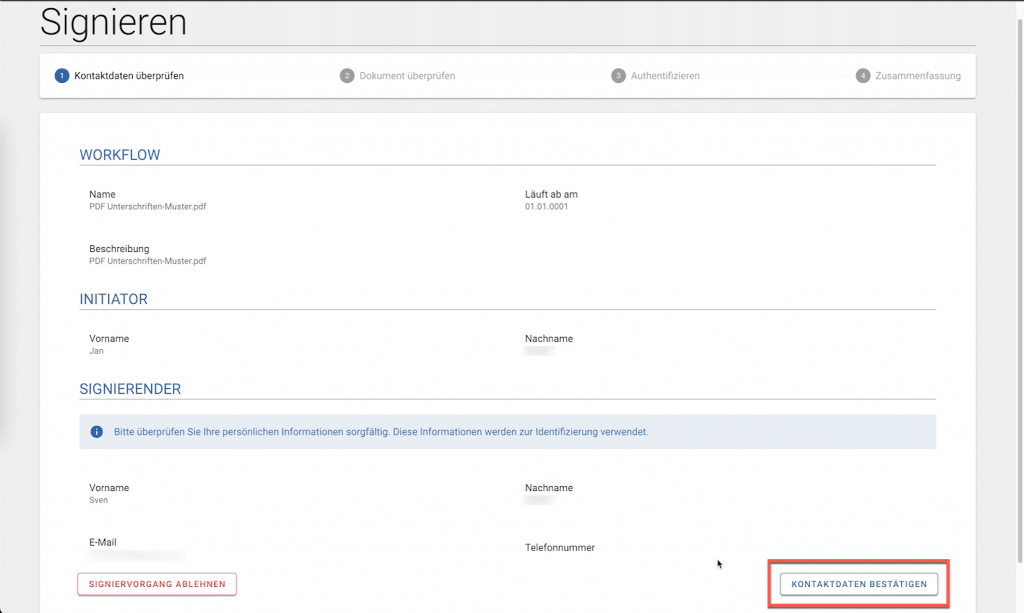
You will then be taken to an overview page where all information about the signing process is displayed. Please check that your personal information is correct, if this is the case, click on “Confirm contact details”.

You can cancel the process at any time by clicking on the “Reject signing” button. The creator of the workflow will be informed accordingly.

The document will now be shown to you in a preview and you will have the opportunity to review the document. Proceed by clicking on the ” Continue” button.

If you are already authenticated, click here #

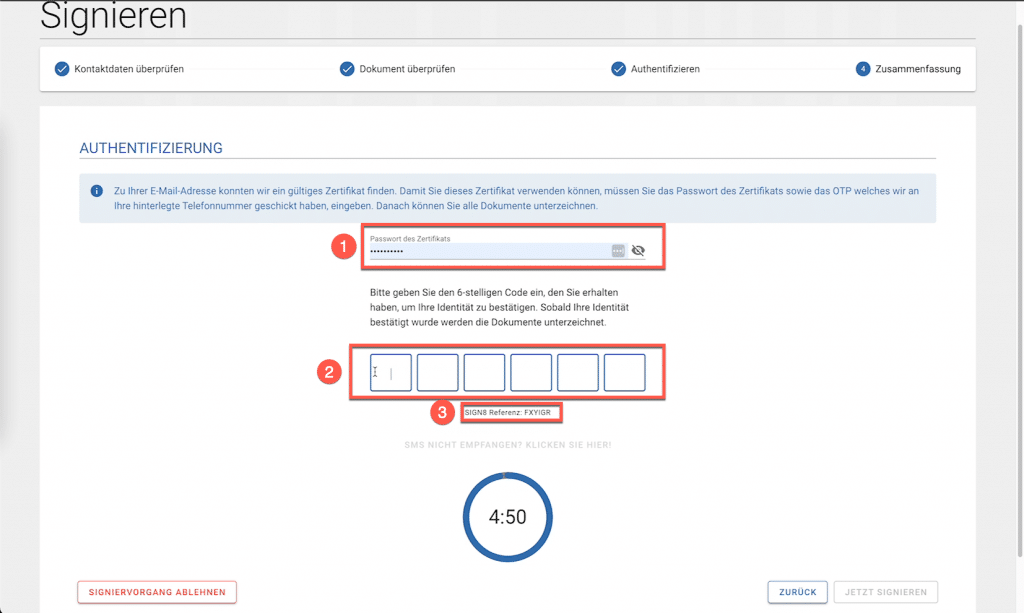
If we already have authentication with a certificate, the process of signing is very simple.

  1. Enter your password for your certificate. (You left this with your first signature)
  2. You will receive an SMS with a one-time pin (OTP). Please enter the six digits.
  3. Please make sure that the reference, which is also given in the SMS, match.

If the password and SMS PIN are correct, you can click on ” Sign now” at the bottom right.

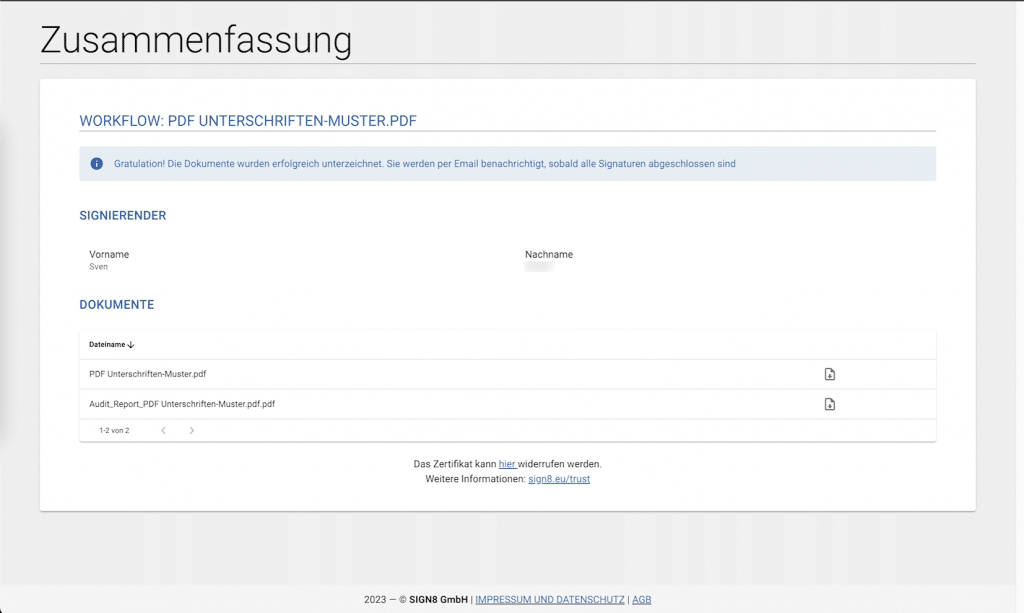
In the summary, you can download the signed document and the audit report. When the document is complete, all stakeholders will receive an email with the signed document and audit report.

Hat Dir dieser Artikel geholfen?
Inhaltsverzeichnis
  • Send documents for signature with QES
  • Sign documents with QES
  • Invitation E-Mail
  • Sign
  • If you are already authenticated, click here
tegolySIGN

© 2025 tegolySIGN